To get accurate mixes, position your studio monitors at ear level, forming an equilateral triangle with your listening spot. Keep them about 3 feet apart, angled inward to direct sound straight at your ears. Avoid placing monitors near walls or reflective surfaces to reduce echoes and bass boosts. Using acoustic treatment and calibration tools can further enhance clarity. Proper placement makes a huge difference—keep exploring to discover more tips for perfect nearfield monitor setup.
Key Takeaways
- Position monitors at ear level and form an equilateral triangle with your listening position for accurate stereo imaging.
- Keep monitors approximately 3 feet apart and angled inward toward your ears to reduce reflections and improve sound clarity.
- Use acoustic treatments like panels at reflection points to minimize early reflections and room resonances.
- Calibrate monitors with measurement tools to ensure flat frequency response and consistent sound reproduction.
- Regularly review and adjust placement, acoustic treatments, and calibration for reliable, true-to-source mixes.

Ekkogo Studio Monitor Isolation Pads Premium Acoustic Foam Elevates Audio Ideal for 5 Inch Speakers Enhanced with Vibredux HD Foam for Superior Isolation
【ADVANCED VIBREDUX HD FOAM】: Experience the acoustic excellence of Vibredux HD foam with Ekkogo's Studio Monitor Isolation Pads….
As an affiliate, we earn on qualifying purchases.
As an affiliate, we earn on qualifying purchases.
Why Proper Nearfield Monitor Placement Matters for Accurate Mixing
Proper nearfield monitor placement is vital because it directly impacts the accuracy of your mix. When your monitors are correctly positioned, you can effectively calibrate them to produce a true, balanced sound. Monitor calibration ensures that your speakers deliver a consistent frequency response, helping you hear every detail accurately. Speaker isolation is also essential; it minimizes vibrations and prevents sound reflections that can distort your perception. If monitors aren’t isolated properly, external noise and resonance can interfere with your listening, leading to inaccurate decisions. Placing your monitors at the right distance and height, and using isolation pads or stands, improves sound clarity. This setup lets you trust what you hear, giving you a solid foundation for precise, professional mixing. Additionally, incorporating landscaping to enhance natural beauty can create a more inspiring environment for your creative work. Effective soundproofing techniques, such as acoustic treatments, can further enhance your mixing space by reducing unwanted noise and reflections. Understanding sound wave behavior in your environment is crucial for optimizing your monitor placement and achieving the best mixing results. Utilizing proper filtration systems can also help maintain a clean and distraction-free mixing environment, ensuring that your ears remain sharp for critical listening. Remember, acoustic drum shields can also play a role in managing sound reflections and improving your overall mixing experience.
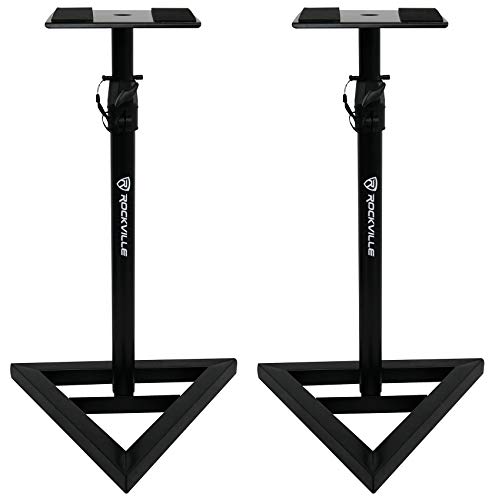
Rockville RVSM1 Pair of Near-Field Studio Monitor Stands, Adjustable Height 33-45in, Heavy-Duty Steel, EVA Foam Padding, Vibration Reduction, for Home Studio Musicians and Audio Engineers
ADJUSTABLE HEIGHT FOR OPTIMAL MONITOR PLACEMENT: Customize stand height from 33 to 45 inches to align monitors with…
As an affiliate, we earn on qualifying purchases.
As an affiliate, we earn on qualifying purchases.
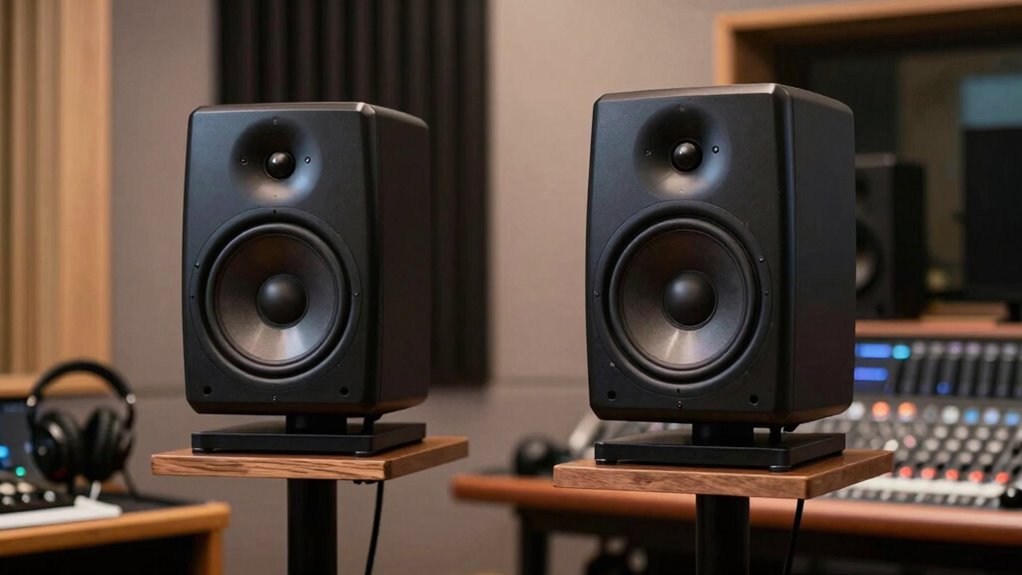
How to Position Your Monitors for the Best Sound

To get the best sound, you need to position your monitors within an ideal listening triangle, where your ears are at equal distances from each speaker. Make sure your monitors are at the correct height so that the tweeters are level with your ears, ensuring accurate sound. Proper placement helps you hear your mix clearly and make better decisions during production.
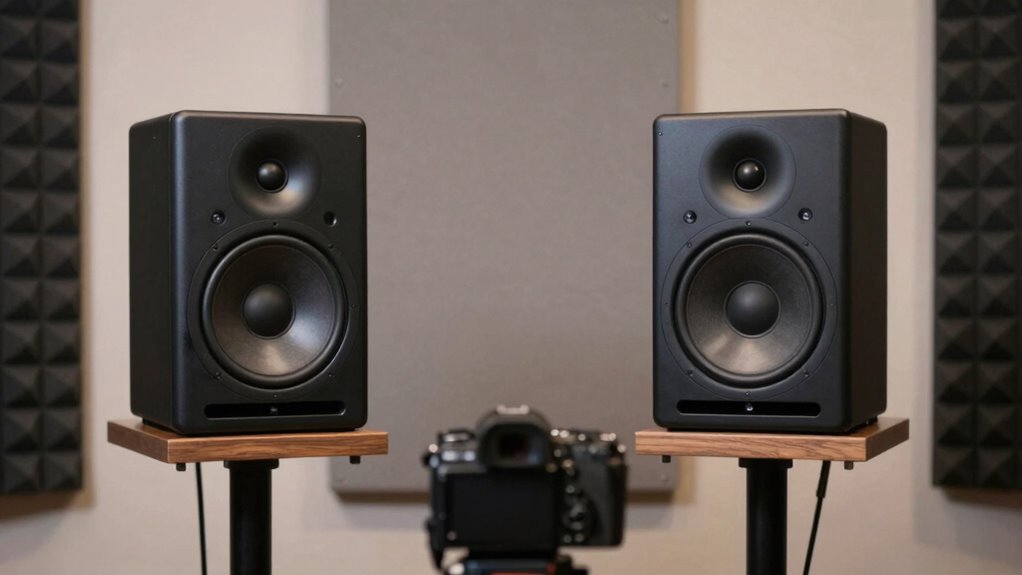
Optimal Listening Triangle
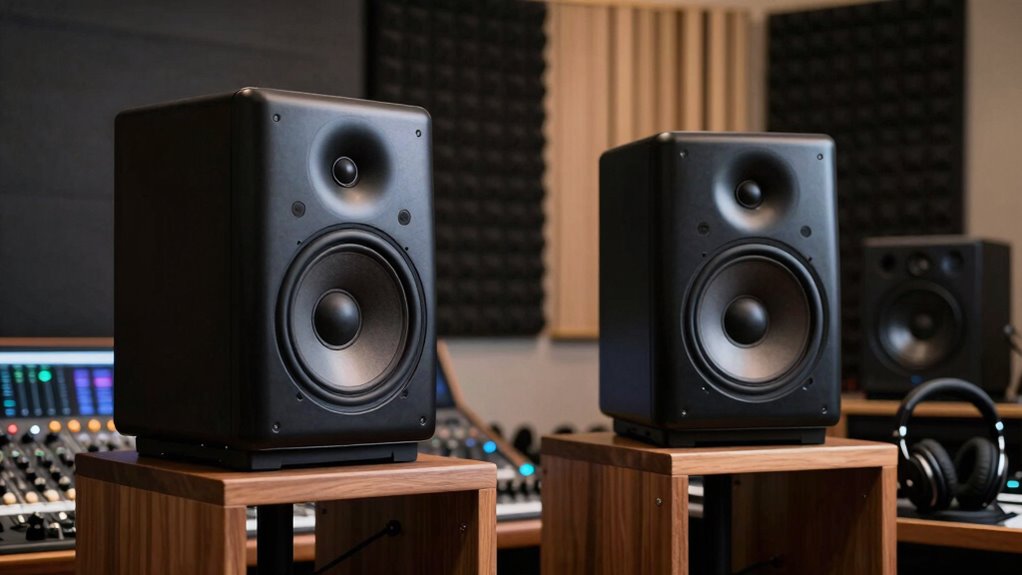
Creating an effective listening environment starts with positioning your monitors correctly within the room. To maximize bass response and stereo imaging, form an equilateral triangle with your head and both monitors. The monitors should be angled inward, pointing directly at your ears, so sound reaches your ears evenly. Keep the distance between the monitors roughly the same as the distance from each monitor to your listening position. This setup ensures a balanced stereo image and prevents phase issues that can muddy your mix. Maintaining this ideal listening triangle helps you hear accurate sound cues, making it easier to judge frequencies and spatial placement. Adjust the distance slightly if needed, but always aim for symmetry to achieve the best sound clarity and consistency.
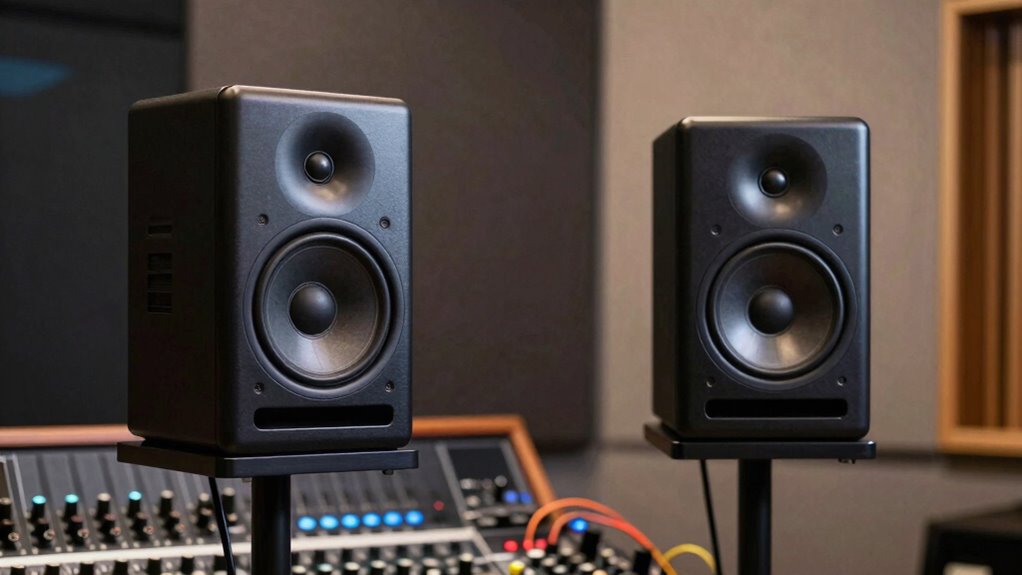
Proper Monitor Height
Sure! Here’s the revised content with the requested changes:
—
Once you’ve positioned your monitors to form the ideal listening triangle, paying attention to their height becomes the next step in optimizing your setup. Your monitors should be at ear level, so the tweeters align with your ears when seated comfortably. Proper monitor height ensures accurate sound reproduction and simplifies monitor calibration, making it easier to identify mix nuances. Additionally, keeping monitors at the right height enhances sound isolation, reducing unwanted reflections and external noise interference. To achieve optimal sound quality, use stands or isolation pads to achieve consistent positioning and prevent vibrations that could distort sound. Furthermore, the intersection of art and culture in sound design can also influence how we perceive audio in a mixed environment. Correct monitor height not only improves sound clarity but also helps you make more precise mixing decisions. High-quality studio monitors are essential for maintaining this alignment for a balanced, accurate listening environment.
—
Let me know if you need any further changes!

AudioSilk Acoustic Panels, 2 Pack, Large, 46" x 23", Pure White
REDUCE NOISE: Struggling with poor acoustics in your recording/rehearsal space? AudioSilk panels give you professional, studio grade sound…
As an affiliate, we earn on qualifying purchases.
As an affiliate, we earn on qualifying purchases.
Finding the Sweet Spot: Tips for Optimal Monitor Placement

Finding the sweet spot for your studio monitors is essential to achieving accurate sound during mixing. To do this, start by calibrating your monitors properly, ensuring they produce balanced sound without distortion. Position your speakers so they form an equilateral triangle with your listening position, keeping them at ear level and about 3 feet apart. Focus on speaker isolation by using isolation pads or stands to prevent vibrations from transferring to your desk, which can muddy your sound. Additionally, consider using smart furniture solutions to optimize your space for better sound quality. Adjust the angle of your monitors inward, aiming directly at your ears. These steps help minimize sound reflections and improve clarity. Remember, small adjustments in placement can considerably impact your mix’s accuracy, so take your time to find the most effective position for your space. Additionally, ensuring that your monitors are placed in a safe environment can further enhance sound quality and reduce unwanted interference.

Simhevn Electronic Digital Calipers, inch and Millimeter Conversion,LCD Screen displays 0-6" Caliper Measuring Tool, Automatic Shutdown, Suitable for DIY/Jewelry Measurement (New150mm Black Plastic)
[4 measuring methods and safety]: Digital calipers can be used to measure inner and outer diameters, depths and…
As an affiliate, we earn on qualifying purchases.
As an affiliate, we earn on qualifying purchases.
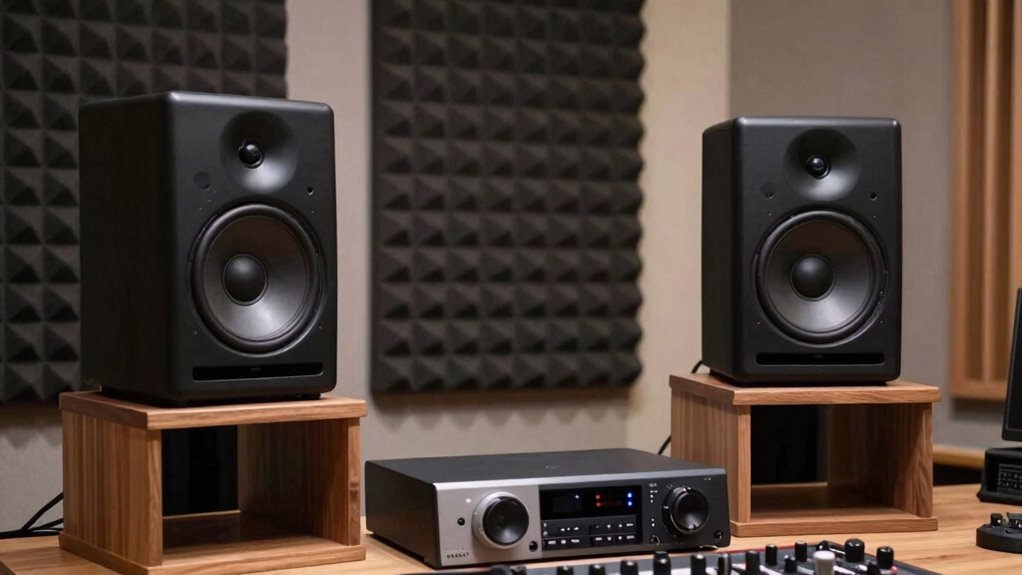
Controlling Room Reflections to Improve Monitor Clarity

Room reflections can considerably distort the sound from your monitors, making it harder to hear your mix accurately. To improve clarity, focus on creating room symmetry, which helps balance reflections across both speakers. Position acoustic panels strategically on walls and ceilings to absorb sound waves and reduce flutter echoes. Use panels on the first reflection points—where sound bounces directly from your monitors to your ears—to minimize early reflections that muddy the mix. Maintaining symmetry in your room’s layout guarantees reflections are evenly managed, preventing one side from overpowering the other. This setup helps your monitors deliver a more accurate sound image, so you can judge your mix with confidence and precision. Additionally, considering the importance of acoustic treatments can further enhance your mixing environment by optimizing sound quality. To achieve an effective setup, pay attention to Victorian steampunk aesthetics that can inspire unique design elements in your space. Improving indoor air quality can also contribute to a healthier mixing space, as airborne pollutants can affect your concentration and overall well-being.
Adjusting Monitor Height and Angle for Comfortable Listening
Sure! Here’s your revised content with the enhancements:
—
Proper monitor placement isn’t just about room acoustics; it also involves setting the right height and angle for your speakers. To achieve ideal sound, follow these steps:
- Adjust the monitor height so that the tweeters are at ear level, enhancing monitor calibration for accurate sound reproduction. This is crucial for achieving optimal sound quality in your mixes. Additionally, fostering a growth mindset can help you be more open to revising your mixes based on what you hear. Investing in quality monitors can also greatly enhance your overall experience, leading to better precious metal investment decisions. Moreover, a consistent practice of foam rolling can improve your physical comfort during long mixing sessions.
- Tilt the monitors inward, aiming their drivers directly at your ears to improve sound isolation and clarity.
- Fine-tune the angle to ensure a direct line of sight with your ears, reducing reflections that can distort your mix. Additionally, consider the importance of proper acoustics to create an optimal listening environment that supports your mixing efforts.
—
Let me know if you need any further modifications!
Tools and Tricks to Fine-Tune Your Nearfield Monitors
To get the most accurate sound from your nearfield monitors, you need to use specific tools and techniques that allow for precise adjustments. Monitor calibration is key—use a calibration microphone and software to balance frequencies and guarantee flat response. Proper cable management minimizes interference and keeps your setup organized, preventing accidental disconnections. Here’s a quick guide:
| Tool / Technique | Purpose | Benefit |
|---|---|---|
| Calibration Microphone | Measure room response | Precise frequency balance |
| Room EQ Software | Adjust monitor settings | Flat, accurate sound |
| Cable Management | Organize and secure cables | Prevent noise and disconnections |
| Sound Level Meter | Check volume levels | Consistent listening levels |
These steps optimize your nearfield monitors for clear, reliable mixing.
Common Mistakes in Monitor Placement and How to Avoid Them

One common mistake is incorrect speaker alignment, which can cause phase issues and unclear sound. Ignoring reflection points and room acoustics also leads to inaccurate mixing decisions. To avoid these issues, make sure proper monitor positioning, address reflection hotspots, and treat your room effectively. Additionally, applying testing methodologies can enhance your understanding of acoustic principles and help in optimizing your mixing environment.
Incorrect Speaker Alignment
Incorrect speaker alignment is a common mistake that can considerably distort your mix. Poor alignment affects how your monitors deliver sound, undermining accurate perception. To avoid this, focus on three key points:
- Speaker calibration: Confirm your monitors are properly calibrated for volume and frequency response. Miscalibration skews your perception of balance.
- Acoustic symmetry: Position your monitors symmetrically relative to your listening position. Unequal placement creates uneven soundstage and phase issues.
- Alignment angle: Angle your monitors so that they point directly at your ears. Misalignment causes comb filtering and reduces clarity.
Ignoring Reflection Points
Ignoring reflection points can profoundly compromise your monitoring accuracy because sound waves bounce off surfaces and create unwanted echoes. These reflection points, often found on walls, corners, or behind your monitors, cause sound diffusion that muddles your mix. When reflections reach your ears at different times than direct sound, it distorts your perception of the audio, making it harder to judge clarity and balance. To avoid this, identify and treat reflection points with proper acoustic treatment, like absorption panels or diffusers. Implementing acoustic treatment techniques can significantly enhance your monitoring environment. By controlling sound diffusion and reducing early reflections, you create a more precise listening environment. This ensures you hear your mix as it truly sounds, helping you make better decisions during the mixing process. Additionally, maintaining work-life balance can enhance your focus and creativity, allowing for more effective mixing sessions. Proper acoustic treatment also involves understanding heat buffering to minimize temperature fluctuations that can affect sound quality. Furthermore, seasonal changes can impact the acoustics of your environment as humidity and temperature fluctuate, necessitating adjustments to your setup.
Poor Room Acoustic Treatment
Poor Room Acoustic Treatment (Common Mistakes in Monitor Placement and How to Avoid Them)
Poor room acoustic treatment often results from common mistakes in monitor placement that can substantially compromise your sound accuracy. Poor room acoustics distort your perception, making precise speaker calibration difficult. To avoid this, focus on:
- Ignoring reflection points: Reflective surfaces cause comb filtering and muddiness, so treat walls and ceilings accordingly. Additionally, high contrast ratios can help improve sound clarity by enhancing the overall acoustic environment.
- Overlooking speaker position: Placing monitors too close to walls can boost bass frequencies unnaturally, skewing your mix.
- Neglecting bass management: Failing to address low-frequency resonances leads to unbalanced sound.
Additionally, understanding the importance of effective storytelling can help you communicate the value of your sound design choices to clients and collaborators.
Troubleshooting Your Setup for Consistent, Accurate Mixes
Ensuring your studio monitors are properly set up is essential for achieving consistent, accurate mixes. Start by calibrating your monitors to guarantee they produce a flat frequency response, which helps you trust what you hear. Use a calibration microphone and a measurement tool to adjust levels and EQ settings. Next, minimize background noise in your space—turn off fans, close windows, and eliminate electronic interference—so you can focus solely on your audio. Check for any unwanted vibrations or reflections that might color your sound and address them. Regularly review your setup to catch any drift in calibration or new sources of noise. Proper troubleshooting keeps your mixes reliable and true to how they’ll sound on other systems.
Key Takeaways for Perfect Nearfield Monitor Setup

Achieving the perfect nearfield monitor setup requires attention to several key details that directly impact your listening accuracy. First, ensure your monitors are positioned at ear level and form an equilateral triangle with your listening position, optimizing subtopic relevance for a natural soundstage. Second, treat your room acoustics to minimize reflections and bass issues, which is essential for accurate sound reproduction and creative sound design. Third, calibrate your monitors with a reliable reference and consider using room correction tools for consistency. These steps help you create an environment where your mixes translate well across systems. Remember, a well-setup nearfield system enhances your ability to make precise adjustments, fostering better creative sound design and more professional results.
Frequently Asked Questions
How Do I Prevent My Monitors From Vibrating or Moving During Use?
To prevent your monitors from vibrating or moving during use, focus on monitor isolation and vibration prevention. Place them on sturdy, vibration-absorbing stands or pads designed for studio monitors. Confirm the stands or pads are level and stable. Additionally, avoid placing monitors directly on surfaces that transmit sound vibrations. Using isolation pads minimizes resonance, keeping your monitors steady and clear, so you get the best sound quality during your mixing sessions.
What Is the Ideal Room Size for Nearfield Monitor Placement?
You should aim for a room size around 10×12 feet or larger for ideal nearfield monitor placement. Proper room acoustics are essential to minimize reflections and standing waves, enhancing sound clarity. Additionally, calibrate your monitors accurately to match your room’s acoustics, ensuring a balanced stereo image. Avoid overly small or large spaces, as they can distort sound and compromise your mixing precision.
How Often Should I Recalibrate My Monitor Setup?
You should recalibrate your monitor setup every few months to maintain ideal sound quality. Calibration frequency depends on your environment and how often you make significant changes, like moving equipment or adjusting room acoustics. Staying consistent with your setup ensures reliable listening, so create a routine for calibration checks. Regular calibration helps you avoid ear fatigue and guarantees your mixes translate well across different systems.
Can Room Treatments Affect Nearfield Monitor Accuracy?
Yes, room treatments can considerably affect nearfield monitor accuracy. Poor room acoustics cause reflections and standing waves that distort sound, making monitor calibration less effective. Proper room treatments, like bass traps and diffusers, improve sound clarity. When you optimize your room acoustics, your monitor calibration becomes more accurate, ensuring you get a true representation of your mix. This helps you make better mixing decisions and achieve professional-quality results.
What Are Signs of Poor Monitor Placement Affecting My Mixes?
If your mixes sound unbalanced or lack clarity, poor monitor placement might be the culprit. Signs include inconsistent soundstage, bass issues, or distorted imaging. You may notice that your monitor height isn’t aligned with your ears or that speaker positioning isn’t symmetrical. Adjust your monitor height to ear level and make sure speakers are placed equidistant and at an ideal angle. Proper placement helps you hear your mixes accurately and avoid costly mistakes.
Conclusion
Think of your nearfield monitors as the compass guiding your mixing journey. When placed correctly, they steer your sound straight to the heart of your mix, ensuring clarity and precision. Avoid common pitfalls, fine-tune your setup, and control reflections like a skilled navigator. With each adjustment, you’re sharpening your sense of direction, steering your music toward professional quality. Master your monitor placement, and your mixes will sail smoothly through any listening environment.