TL;DR
A closet can become a surprisingly good vocal booth with strategic placement, sealing gaps, and combining absorption with soundproofing. Moving the rig out of the room is the most effective fix, but proper ventilation and sealing are key for a closet setup.
Ever wondered if you can turn a tiny closet into a quiet recording space? The answer is yes—if you understand the difference between dampening reflections and blocking sound. Most people jump straight to foam panels, but that’s like putting a band-aid on a leaking pipe.
This guide will show you how to make a closet work as a studio, with real, practical steps. You can also find helpful tips on acoustic dampening, placement, and the “rig in the closet” setup. From placement tips to sealing gaps, you’ll learn where to put your mic, how to treat reflections, and when a ‘rig in the closet’ actually works best.
It’s about working smarter, not just louder or more cluttered.Acoustic dampening
& the rig in the closet.
The most powerful noise fix isn’t a material — it’s a floor plan. A rig you can’t hear because it’s in another room beats any amount of foam. Tap the approaches in Part 1 to see what actually works.
(another room)
(levers 1–4)
(door / barrier)
(acoustic foam)
Contain the noise, not the heat
Key Takeaways
- Sealing gaps and combining soundproofing with mass-loading is far more effective than foam alone.
- Place your microphone at reflection points and use bass traps in corners for clearer recordings.
- Moving your rig into another room or closet can eliminate most noise issues—if ventilation and heat are managed.
- Ventilation is crucial—use ducting, active exhausts, or soundproof enclosures to keep equipment cool.
- A closet isn’t a soundproof room—manage expectations and focus on reflections and leakage for best results.

Focusound 52 Pack Acoustic Foam Panels 1" x 12" x 12" Sound Proof Foam Panles Soundproofing Noise Cancelling Wedge Panels for Home Office Recoding Studio with 300PCS Double-Side Adhesive
Soundproofing - Acoustic foam panels triangular grooves structure for better noise absorption, helps to reduce and absorb unwanted...
As an affiliate, we earn on qualifying purchases.
As an affiliate, we earn on qualifying purchases.
Why Most Closet Soundproofing Fails (And What Actually Works)
Many assume adding foam panels makes a space soundproof. For more on effective soundproofing techniques, see acoustic dampening, placement, and the "rig in the closet" setup. The truth? Acoustic foam mainly reduces echoes and reflections inside a room. It does little to block sound from leaking out or in, especially low-frequency noise from your rig.
Soundproofing needs mass, sealing, and barriers. Think of a thick wall—adding drywall with damping compounds or sealing gaps with weatherstripping. These methods cut sound transfer by over 70% according to soundproofing experts.
For example, a simple foam panel might quiet your voice inside, but if your closet door leaks sound, the outside noise still drifts in. It’s like trying to hold back a tsunami with a paper umbrella.
Understanding this helps you prioritize what truly matters: sealing gaps and adding mass will have a much more significant impact than just hanging foam panels, which mainly address internal reflections. The tradeoff is that soundproofing often requires more effort and sometimes structural changes, but the results are far more effective at reducing noise transfer.

8 Pack Self-Adhesive Soundproof Wall Panels, 12 x 12 x 0.47 in Sound Proof Foam Panels for Walls, 1.2lb/ft³ High Density, Thicker 0.47in, Acoustic Panel, Peel and Stick Wall Panel Studio Black
【Excellent Quality】: This wall soundproofing foam board is made of high-quality 100% polyester, odorless and flame retardant. There...
As an affiliate, we earn on qualifying purchases.
As an affiliate, we earn on qualifying purchases.
How to Position Your Mic for the Best Closet Sound — Without Echo
The best mic placement in a closet? Position it close to your mouth, ideally away from reflective surfaces like walls or the door. Use the 'reflection point' trick: sit where your voice hits the wall behind the mic, then place acoustic treatment at that exact spot.
Why does this matter? Because reflections cause echo and muddiness, degrading the clarity of your recordings. Proper placement minimizes these issues, making your voice sound more natural and professional. You might also explore how acoustic dampening, placement, and the "rig in the closet" setup can enhance your recordings. For instance, if your closet has a shiny metal door, placing absorption panels behind the mic or at reflection points prevents sound from bouncing back into the mic, which can cause comb-filtering effects.
Keep the mic at least 6-8 inches from the wall to reduce the pickup of room sound. If you place the mic too close to reflective surfaces, you risk capturing unwanted echoes that muddy the recording. Using a reflection filter can help, but it’s not a substitute for thoughtful placement and room treatment. The key is understanding how sound interacts with your environment and adjusting your mic position accordingly to optimize clarity and reduce unwanted reflections.

VEVOR Portable Vocal Booth, 6.56 ft Height, Portable Recording Studio with Travel Bag, Mobile Tablet Stand, Thickened Soundproofing, Sound Isolation Booth for Echo-Free Vocals, Podcasts, Voiceovers
Say Goodbye to Echoes: Built with durable Oxford cloth and acoustic padding, this recording booth for the home...
As an affiliate, we earn on qualifying purchases.
As an affiliate, we earn on qualifying purchases.
Best Wall and Corner Treatment for Small Closets
To tame echo and low-end buildup, treat the reflection points and corners. Use 2-inch foam panels for vocals, but add bass traps in the corners if you notice boomy low frequencies. Learn more about effective acoustic treatment at acoustic dampening, placement, and the "rig in the closet" setup. Bass traps prevent standing waves that cause muddiness.
Why are corners so critical? Because low frequencies tend to accumulate there due to their longer wavelengths, leading to bass buildup that colors your recordings. Properly placed bass traps absorb these frequencies, resulting in a cleaner, more accurate sound. For example, in a tiny closet, placing bass traps in the two corners behind you reduces low-frequency resonances, making your recordings clearer and more balanced.
Implementing this involves placing foam panels at reflection points on walls—these are typically where sound bounces directly back to the mic—and adding bass traps in corners where low-end frequencies tend to concentrate. Filling the entire wall behind your mic with absorption can further reduce reflections, but pay special attention to corners, which are often overlooked but crucial for controlling low frequencies. The tradeoff is that adding traps and panels takes space and can complicate setup, but the payoff is a much more controlled sound environment.
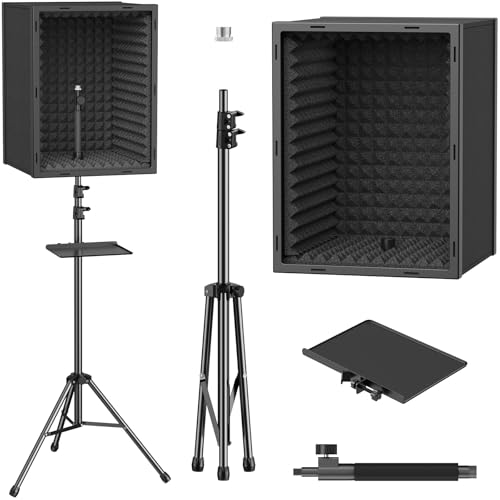
TONOR Personal Vocal Booth, Microphone Isolation Shield for Studio, Framed Acoustic Foam Box, Sound Absorbing, for Professional Recording, Podcast, Singing, Adjustable Height, Max 190 cm/53.1inch
Sound Absorption & Isolation: This vocal booth features a box design combining five high-density foam and sound absorbing...
As an affiliate, we earn on qualifying purchases.
As an affiliate, we earn on qualifying purchases.
Sealing Gaps and Doors: The Hidden Keys to Quiet
Even tiny gaps can let sound leak out or in. Sealing cracks around the door frame, outlets, and floor junctions is essential. For detailed tips on sealing gaps, see acoustic dampening, placement, and the "rig in the closet" setup. Use acoustic sealant or weatherstripping around the door to block sound paths.
Why does this matter? Because sound leaks through small openings—sometimes imperceptible—that can significantly undermine your efforts at isolation. For example, sealing the gap between your closet door and frame can reduce noise escape by up to 50%. A quick fix: stick weatherstripping around the door edges and fill small cracks with acoustic caulk. This prevents sound from sneaking through tiny openings and ensures that the soundproofing measures you implement are effective. Remember, a well-sealed closet not only keeps external noise out but also prevents your recordings from leaking out, which is especially important if you share your space or need privacy.
In effect, sealing gaps is often the most cost-effective and impactful step you can take. It’s like closing the holes in a bucket—no matter how much foam or mass you add, if the leaks remain, sound will escape. The tradeoff is that sealing requires attention to detail and sometimes minor modifications, but the results can dramatically improve your sound isolation.
Frequently Asked Questions
Will acoustic foam make my closet soundproof?
No, acoustic foam mainly reduces echo and reflections inside the space. It does little to block sound passing through walls or gaps. To truly soundproof, you need sealing, mass, and barriers.Where should I place the microphone inside the closet?
Position it close to your mouth, about 6-8 inches from your lips, and at reflection points—usually where your voice hits the wall behind you. Use a reflection filter if needed.Do I need bass traps in a small closet?
Yes, especially if you notice muffled low frequencies or boomy sound. Placing bass traps in the corners helps control standing waves and low-end buildup.How do I keep my rig cool in a closet?
Use ducted ventilation or active exhaust. For more insights on keeping your rig cool in small spaces, visit wihok.com. fans that vent outside. Combine with sound-dampening duct lining to prevent noise leaks while maintaining airflow.Can I make a closet work without permanent modifications?
Absolutely. Sealing gaps, adding portable absorption panels, and using a mic reflection filter can turn a closet into a decent recording space without major changes.Conclusion
Transforming a closet into a quiet workspace isn’t magic; it’s about smart placement, sealing gaps, and understanding limits. A well-treated closet can serve as a practical vocal booth or inference rig, but it won’t silence everything.
Think of it like tuning a musical instrument—small adjustments make a big difference. With the right mix of sealing, treatment, and ventilation, your closet can become a surprisingly effective sound environment. Now, go make your hidden studio work—quietly.