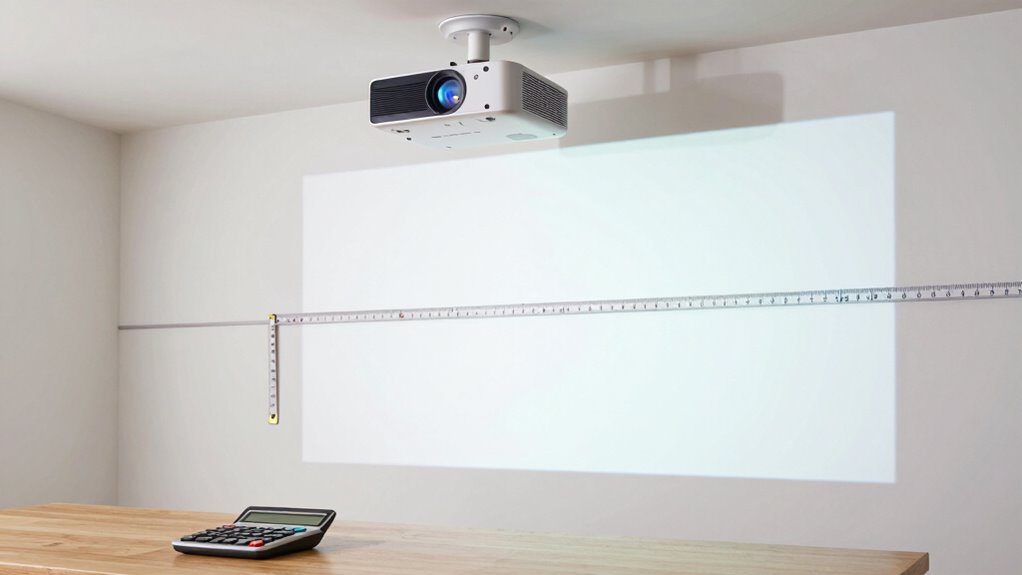
Your projector’s throw distance is how far it needs to be from your screen to create a clear, properly sized image. Short-throw projectors work closer to the screen, while longer ones need more space. Choosing the right distance depends on your room size and screen size, but don’t worry—there are simple tools and tips to help you find the perfect spot without complex math. Keep going to discover how to get the best picture every time.
Key Takeaways
- Throw distance is the space between the projector and screen, affecting image size and clarity.
- Short-throw projectors work close to the screen; long-throw projectors are for larger venues.
- Proper placement depends on room size, ambient light, and desired image size without complex calculations.
- Adjustments like focus and keystone correction help achieve a clear, distortion-free image.
- Using simple online calculators can help determine ideal projector distance without complicated math.
![Smart Projector [Google TV Built-in & 4K Support] with WiFi and Bluetooth, Portable Mini Movie Short Throw Projector Outdoor with Built-in Apps Auto Focus Keystone for Home Theater Bedroom Ceiling](https://m.media-amazon.com/images/I/51KwXGkgvnL._SL500_.jpg)
Smart Projector [Google TV Built-in & 4K Support] with WiFi and Bluetooth, Portable Mini Movie Short Throw Projector Outdoor with Built-in Apps Auto Focus Keystone for Home Theater Bedroom Ceiling
[Built-in Google TV | 10,000+ Apps | Voice Control] This 2026 smart mini projector with wifi and bluetooth…
As an affiliate, we earn on qualifying purchases.
As an affiliate, we earn on qualifying purchases.
What Is Projector Throw Distance and Why Is It Important?

Ever wondered how close your projector needs to be to display a clear, sizable image? That’s where throw distance comes into play. It’s the space between your projector and the screen, impacting image size and quality. Different projector lens types, such as short-throw or standard lenses, influence how far back your projector can be placed. Short-throw lenses let you position the projector closer to the screen, ideal for small rooms. Meanwhile, ambient light considerations also matter — brighter rooms may require projectors with higher lumens to ensure visibility. Understanding throw distance helps you choose the right projector for your space, guaranteeing sharp images without distortion. Additionally, knowing about contrast ratios can help you further optimize your viewing experience. Furthermore, exploring digital content formats can enhance how you present your visuals, making setup easier and keeping your viewing experience crisp and enjoyable.
projector distance calculator
As an affiliate, we earn on qualifying purchases.
As an affiliate, we earn on qualifying purchases.
How to Measure Your Room for the Perfect Projector Placement

To find the perfect projector placement, start by measuring your room accurately. Use a tape measure to determine the distance between your desired screen location and potential projector spots. Consider decorating ideas—like furniture placement and wall decorations—that could affect projection angles or obstacle placement. Also, plan your sound system setup, making sure speakers won’t block the projector’s line of sight or cause interference. Measure ceiling height and wall width to establish if the projector can be positioned at the right distance without creating shadows or distortion. Mark these measurements on the floor or walls for a visual guide. Taking these steps guarantees you find a spot that offers ideal image size and quality while fitting your room’s aesthetic and audio needs.

【Officially-Licensed APP & Native 1080P】Thinnest 1.81" Smart Mini Projector with WiFi and Bluetooth, Auto Focus & Keystone Portable Outdoor Projector, VOPLLS 4K Support Home Movie Projector
【Compatibe with Netflix, No Extra Devices Needed】This isn’t just a projector—it’s your "Hollywood Digital Pass." Instantly access a…
As an affiliate, we earn on qualifying purchases.
As an affiliate, we earn on qualifying purchases.
Types of Projectors and How They Affect Throw Ratios

Different types of projectors have varying throw ratios, which directly impact how far you need to place them from the screen for your desired image size. Short-throw projectors are great for small rooms, needing only a few feet, while long-throw models work well for larger spaces. Keep in mind that the type influences more than placement; for example, portable projectors often have shorter bulb lifespans but offer wireless connectivity options for easy setup. Here’s a quick comparison:
| Type | Typical Throw Ratio | Key Feature |
|---|---|---|
| Short-Throw | 0.3 – 1.0 | Compact size, ideal for small rooms |
| Standard-Throw | 1.5 – 2.0 | Versatile, common for home use |
| Long-Throw | 2.0+ | Suitable for large venues |

Mdbebbron 120 inch Projector Screen 16:9 Foldable Anti-Crease Portable Projector Movies Screens for Home Theater Outdoor Indoor Support Double Sided Projection
CONVENIENT TO STORAGE AND CARRY : Compact one-piece,lightweight and folding design. You can fold the projector screen in…
As an affiliate, we earn on qualifying purchases.
As an affiliate, we earn on qualifying purchases.
Choosing the Right Throw Distance for Your Screen Size

Choosing the right throw distance is essential to achieving a clear, properly sized image on your screen. To do this, consider your screen size and room lighting conditions. A larger screen requires a longer throw distance to avoid image distortion. In bright rooms, you might need to position the projector closer to ensure the image remains vivid and visible. Conversely, in darker rooms, you can increase the throw distance for a more immersive experience. Keep these factors in mind:
Choosing the correct throw distance ensures a clear, properly sized image tailored to your room and lighting conditions.
- Larger screen size needs a longer throw distance
- Bright room lighting may require closer placement
- Dimmer rooms allow for more flexibility
- Maintain recommended ratios for superior image quality
Balancing these elements ensures your projector delivers the best picture quality for your space.
How to Adjust Your Projector for a Clear, Sharp Image

Ensuring your projector displays a clear, sharp image requires making precise adjustments to several key settings. First, focus on projection angles; tilting or misaligning the projector causes blurriness. Adjust the lens and mount to ensure it’s perpendicular to the screen. Additionally, Victorian steampunk fashion emphasizes the importance of presentation, much like how a well-aligned projector enhances image clarity. Next, consider your screen material—glossy screens reflect light differently than matte surfaces, affecting sharpness. Additionally, understanding emerging trends in digital publishing can provide insights on the best practices for projector setups. The history of women’s golf showcases how precision and technique can elevate performance, much like adjusting your projector. To achieve optimal results, ensure you are aware of projector specifications that can influence image quality. Use keystone correction and lens shift features to optimize image geometry. Additionally, proper cabling solutions can significantly enhance the overall video quality.
| Projection Angles | Screen Materials | Adjustment Tips |
|---|---|---|
| Keep level | Matte | Use lens shift for alignment |
| Minimize tilt | Glossy | Adjust keystone for distortion |
| Avoid skewing | Textured | Fine-tune focus for sharpness |
These steps help you achieve a crisp, clear image tailored to your setup.
Top Mistakes to Avoid When Setting Up Your Projector’s Throw Distance

One common mistake when setting up your projector’s throw distance is ignoring the manufacturer’s recommended specifications. Not following these guidelines can lead to poor image quality and increased strain on your projector, affecting its long-term projector maintenance. To avoid this, pay attention to:
- Placing the projector too close or too far from the screen, which distorts the image
- Overlooking proper screen calibration, resulting in a blurry or skewed picture
- Neglecting to check the projector’s lens and light path for obstructions
- Ignoring the importance of aligning the projector’s lens with the screen for optimal focus
Achieving the correct throw distance ensures a clear image and preserves your projector’s lifespan. Always verify specifications and regularly maintain your equipment for the best viewing experience.
Using a Simple Tool or Calculator to Find Your Ideal Throw Distance
Using a simple calculator tool makes finding the right throw distance quick and straightforward. You just input your projector model and screen size, and the tool guides you step-by-step. This helps guarantee your setup is accurate without complicated calculations. Understanding wood movement is crucial in ensuring that your projector setup remains stable over time, just as it is in woodworking projects.
Easy Calculator Tools
Finding the right projector throw distance can seem complicated, but thankfully, simple calculator tools make it straightforward. These tools help you quickly determine the perfect distance by inputting key details about your setup. They’re especially useful for planning where to position your projector for best image size and clarity. Many calculators also consider factors like color calibration, ensuring your images look vibrant, and speaker placement, so sound aligns with your visuals.
Here’s what these tools typically help with:
- Estimating the ideal throw distance based on your screen size
- Adjusting for different projector models
- Ensuring proper color calibration for vivid images
- Planning speaker placement for balanced sound
Using these calculators saves time and reduces guesswork, making your setup smooth and efficient.
Step-by-Step Guidance
To accurately determine your ideal throw distance, start by gathering key details about your projector and setup. Use a simple tool or calculator to input factors like screen size, projector model, and room dimensions. This helps guarantee proper color calibration and sound integration, avoiding issues like dim images or audio mismatch. Here’s a quick guide:
| Step | Action | Focus Area |
|---|---|---|
| Measure room size | Find available space for projector placement | Throw distance accuracy |
| Input projector specs | Enter model, lumens, and lens type | Image quality, color calibration |
| Adjust zoom and lens | Use calculator to find best distance | Sharpness, clarity |
| Verify throw distance | Set projector accordingly | Proper alignment |
| Test setup | Fine-tune for color calibration and sound sync | Overall viewing experience |
A well-designed workspace can greatly enhance ergonomics and productivity while you’re immersed in your projector setup. Additionally, knowing your projector’s brightness rating can significantly influence the image quality in your viewing environment.
Troubleshooting Common Issues With Projector Focus and Fit

If your image isn’t sharp, adjusting the focus correctly can make a big difference. You may also need to correct keystone distortion to guarantee a properly aligned picture. Let’s explore how to troubleshoot these common focus and fit issues effectively.
Adjusting Focus Properly
Achieving a sharp, clear image depends on adjusting the focus properly, and this step is crucial when troubleshooting projector issues. Proper focus ensures your picture is crisp and free of blurriness. To fine-tune the focus, check that the lens is clean and rotate the focus ring slowly until the image sharpens. While doing this, consider color calibration to ensure colors are vivid and accurate, which enhances overall picture quality. Additionally, maintaining a clean filtration system can improve the overall performance of your projector. Also, verify audio synchronization, as misaligned audio can distract from visual clarity. Keep these tips in mind:
- Clean the lens to eliminate dust or smudges
- Adjust the focus ring gradually for precision
- Check settings for color calibration to match your environment
- Confirm audio sync isn’t affecting your perception of focus
- Incorporating DIY beauty secrets can add a creative touch to your viewing environment.
Regularly cleaning your projector can also prevent stain removal issues that might arise from dust buildup.
These steps help optimize focus, making your viewing experience seamless.
Correcting Keystone Distortion
Keystone distortion occurs when the projector isn’t aligned properly with the screen, causing the image to appear trapezoidal rather than rectangular. To fix this, use keystone correction to straighten the image and reduce distortion. Many projectors have auto keystone correction features, but manual adjustments often yield better results. When correcting keystone distortion, ensure the projector is as level as possible and adjust the lens or settings accordingly.
| Issue | Solution |
|---|---|
| Image appears trapezoidal | Use keystone correction feature |
| Image still distorted | Reposition the projector to align properly |
| Focus is off | Refocus after correction |
| Distortion persists | Check for uneven mounting or obstructions |
Frequently Asked Questions
Can Projector Throw Distance Change Over Time or With Different Settings?
Yes, your projector’s throw distance can change over time or with different settings. Adjusting projection height or using keystone correction can affect how far the projector needs to be from the screen. When you change these settings, the image size and clarity might shift, making it seem like the throw distance varies. Regularly check and tweak your setup to maintain the best picture quality and proper projection alignment.
How Does Ambient Light Affect Projector Throw Distance Requirements?
Ambient light impacts your projector’s throw distance requirements because increased ambient light can wash out the projected image, making it appear dimmer. To combat this, you might need to move the projector closer to the screen, ensuring sufficient screen brightness and contrast. Conversely, in darker rooms, you can position the projector farther away without sacrificing image quality. Adjusting for ambient light helps you maintain clear, bright visuals at the ideal throw distance.
Are There Portable Projectors With Adjustable Throw Distances?
Did you know that over 60% of portable projectors now feature adjustable throw distances? Yes, many portable projectors come with lens flexibility, allowing you to easily change the throw distance for different spaces. These models offer adjustable throw features, making them versatile for various ambient light conditions and wall colors. With these projectors, you can enjoy crisp images even in small or irregular rooms, enhancing your viewing experience.
What Impact Does Projector Lens Quality Have on Throw Distance Accuracy?
Lens quality directly impacts throw distance accuracy because higher-quality lenses minimize lens distortion, ensuring the projected image stays proportional and true to size. When your projector has a good lens, you get clearer images with better image clarity, even at varying distances. Poor lenses can cause distortion, making the image look stretched or skewed, and can also reduce overall sharpness, affecting your viewing experience.
Can Wall Color Influence the Effective Throw Distance Needed?
Wall color can considerably influence the effective throw distance you need. Think of it as the canvas on which your projector paints; a darker wall absorbs more light, making images appear sharper without needing extra space. Conversely, a light-colored wall reflects more light, often requiring you to move the projector closer to maintain image clarity. So, your wall’s color truly acts as a silent partner in your viewing setup, affecting how far your projector should be.
Conclusion
Did you know that choosing the right projector throw distance can improve your image clarity by up to 50%? By understanding your room size, projector type, and screen preferences, you’ll guarantee a crisp, immersive viewing experience. Avoid common setup mistakes, use handy tools, and fine-tune your projector for the best picture. With just a little knowledge, you’ll be enjoying movies and presentations with stunning clarity—no math headache required!