
To make authentic malloreddus, start with durum semolina flour and gradually add warm water with a pinch of salt, kneading until the dough is firm and elastic. Rest it covered for 30-60 minutes, then shape into ropes, cut into small pieces, and create ridges using a gnocchi board or fork. Dry or cook fresh in boiling salted water, pairing them with rich Sardinian sauces. Keep exploring to master every step of this traditional craft.
Key Takeaways
- Use durum wheat semolina flour and water in a 2:1 ratio, kneading until smooth, then rest for 30-60 minutes.
- Roll dough into small ropes, cut into 2 cm pieces, and shape with ridged surfaces or grooved tools.
- Dry the shaped malloreddus at low temperature for about 24 hours to preserve shape and flavor.
- Cook fresh pasta in salted boiling water for 5-7 minutes until al dente, then toss with traditional Sardinian sauces.
- Store dried malloreddus in a cool, dry place or use MAP packaging with nitrogen and CO₂ for longer shelf life.

Caputo Antimo Di Grano Duro Rimacinata Semolina Flour – All Natural Dough for Fresh Pasta, 2.2 lb
PRODUCT OF ITALY: For generations, Caputo Flour has been the number one choice of the best pizza makers…
As an affiliate, we earn on qualifying purchases.
As an affiliate, we earn on qualifying purchases.
Understanding the Traditional Ingredients for Malloreddus
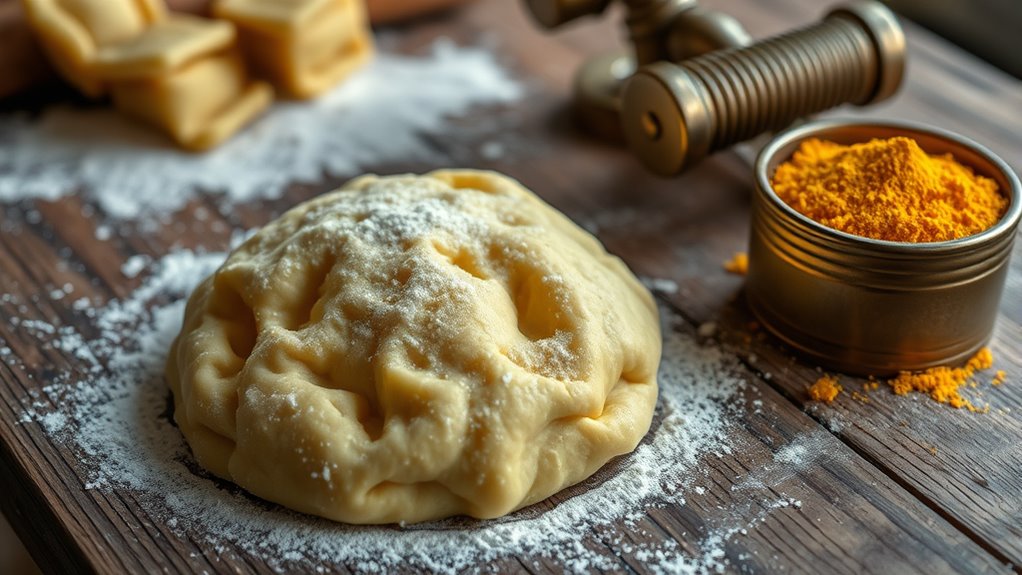
To understand the traditional ingredients for malloreddus, you should know that the core component is durum wheat semolina flour, specifically *semola rimacinata*. This coarse, high-gluten flour gives the pasta its firm, slightly gritty texture and a signature “toothy bite” that holds sauces well. The usual ratio is about two parts semolina to one part water by volume, creating a firm dough that’s easy to work with. Water, warmed to help hydrate the semolina, is the only liquid used—no eggs are traditionally added. Sometimes, a pinch of saffron is included, steeped in warm water first, to give the dough a golden hue and subtle earthy flavor. A small amount of salt enhances flavor and gluten development, completing the essential ingredients for authentic malloreddus. Durum wheat semolina is preferred because it develops the desired texture and strength necessary for shaping and cooking the pasta properly.

Fante’s Gnocchi Board, Beechwood, Made In Italy, For Shaping Gnocchi, Adding Texture, Holding More Sauce, And Traditional Italian Cooking
Fante’s Cousin Liana’s Gnocchi Board: Shapes and textures authentic gnocchi for light, plump pasta that holds more sauce;…
As an affiliate, we earn on qualifying purchases.
As an affiliate, we earn on qualifying purchases.
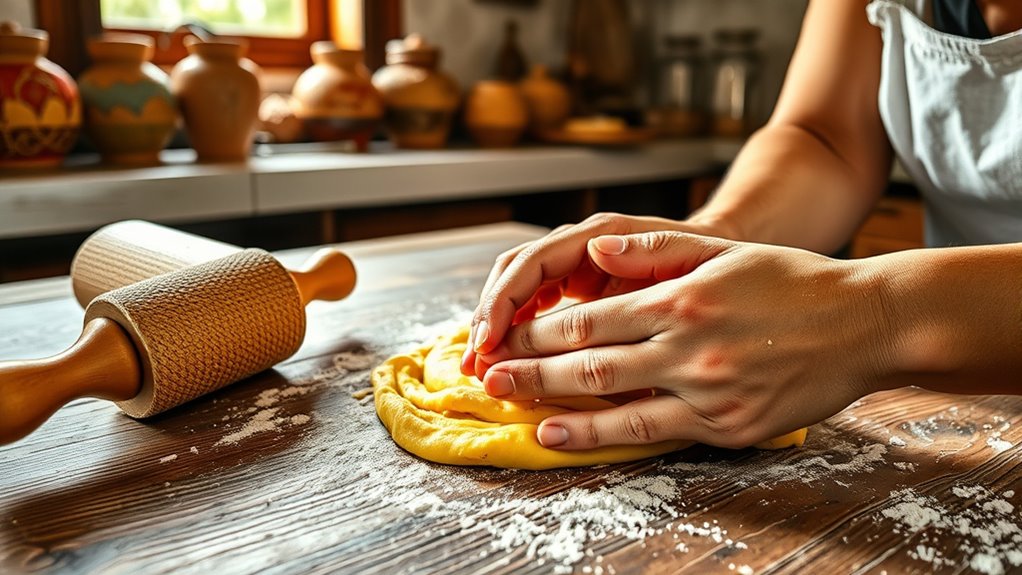
Preparing the Semolina Dough Perfectly
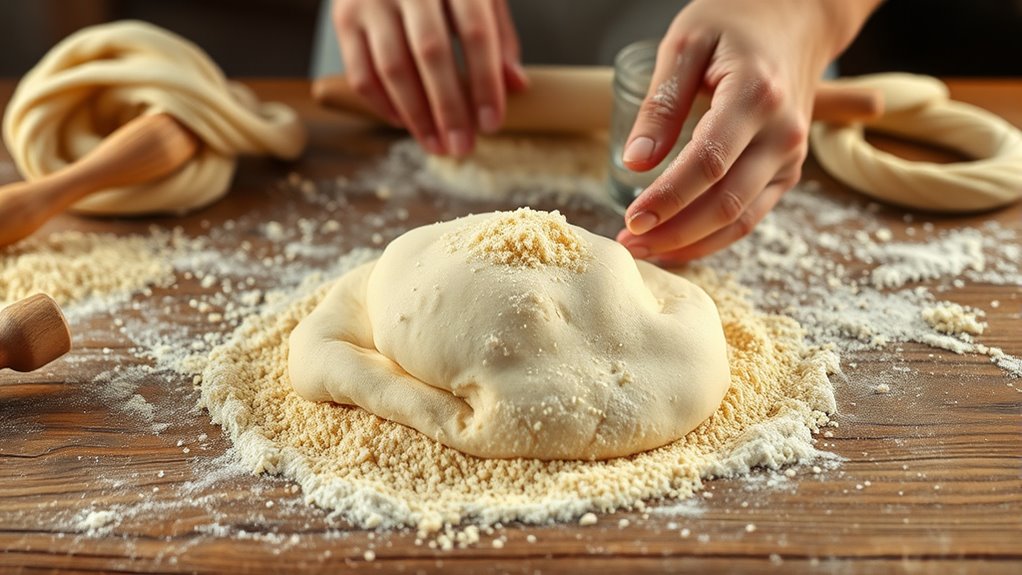
To prepare the perfect semolina dough, you need to focus on achieving the right hydration and kneading it to develop the ideal texture. Add warm water gradually, stopping before it becomes sticky, and knead until the dough is firm yet elastic. Properly hydrated and kneaded dough will shape easily and hold its form during cooking. Incorporating saffron into the water can enhance both flavor and appearance, but it’s optional. Hydration is key to ensuring the dough is neither too dry nor too sticky, which affects the final texture and ease of shaping.
Achieving Optimal Hydration
Achieving ideal hydration begins with understanding the right semolina-to-water ratio, which typically ranges around 200 grams of semolina to 110 grams of warm water. Using warm water (not boiling) helps partially gelatinize starches, improving hydration and dough cohesion. Adjustments may be needed based on semolina fineness; coarser types often require slightly more water. Adding a teaspoon of olive oil is optional but can enhance elasticity. Before mixing, dissolve salt in water for even distribution, aiding gluten development. Create a well in the flour and slowly pour water in, mixing with a fork or fingers to avoid lumps. Rest the dough for 10-30 minutes to absorb moisture fully. Proper hydration results in a firm, pliable dough that shapes well and cooks evenly. Understanding flour quality can also influence how much water is needed for perfect dough consistency.
Kneading for Texture
Kneading semolina dough properly is essential for developing the right texture and gluten structure. Aim for about 8 to 10 minutes of kneading; this helps it become elastic and smooth. Start with a rough mixture, then knead until it springs back when pressed, signaling gluten development. If the dough sticks, add a little semolina flour; if it’s crumbly, add water gradually. Work the dough until it no longer tears easily and feels cohesive. Rest the dough wrapped for at least 30 minutes to relax gluten and improve handling. Using tools like a stand mixer with a dough hook can help achieve consistent results, or knead by hand for tactile feedback. Proper kneading also influences the dough’s texture and elasticity, crucial for authentic Sardinian pasta. Here’s what you should visualize:
| Texture | Feel | Appearance |
|---|---|---|
| Rough & shaggy | Sticky or crumbly | Cracked or dry surface |
| Smooth & elastic | Springy, cohesive | Shiny, uniform surface |
| Ready to shape | Slight tackiness, bounce | Well-formed, no tearing |
Proper kneading not only improves the dough’s elasticity but also enhances the pasta’s ability to hold sauce, reflecting its cultural importance in Sardinian cuisine.
Ourokhome Collapsible Pasta Drying Rack, Plastic Foldable Homemade Fresh Spaghetti Stand Dryer Noodle Hanger for Kitchen with 10 Arms, Stable, Easy Storage, Quickly Set Up (White)
A GREAT TOOL FOR DRYING NOODLES: Ideal for drying a variety of pasta such as spaghetti, tagliatelle, fettuccine,…
As an affiliate, we earn on qualifying purchases.
As an affiliate, we earn on qualifying purchases.
Resting and Restoring Dough Elasticity
Resting your dough is key to improving its flexibility and elasticity, making it easier to shape into malloreddus. Temperature and humidity during rest influence hydration and gluten relaxation, so maintaining consistent conditions helps achieve ideal results. A proper rest period allows the dough to relax, reducing tearing and ensuring a smoother, more manageable texture. Additionally, allowing the dough to rest covered prevents it from drying out and helps develop a better texture. Proper rest also facilitates gluten relaxation, which enhances dough elasticity and overall workability.
Importance of Rest Period
Allowing the dough to rest after kneading is essential for restoring its elasticity and guaranteeing it’s easy to shape. Resting relaxes the gluten network, preventing it from snapping back when rolled, resulting in a smoother, more balanced dough. This makes forming Malloreddus straightforward and maintains their characteristic ridges. Proper rest also enables hydration, especially in semolina, promoting cohesion and even water absorption. To maximize, cover the dough to prevent surface drying and ensure it remains moist. The table below highlights key factors affecting rest:
| Factor | Effect |
|---|---|
| Rest duration | Longer times improve elasticity and hydration |
| Covering during rest | Prevents drying, keeps surface moist |
| Dough temperature | Affects gluten relaxation and hydration |
| Flour type | Influences resting time needed for optimal results |
| Resting environment | Warm and humid conditions accelerate hydration and gluten relaxation |
Incorporate these considerations to achieve ideal texture and shape. Additionally, using an appropriate resting environment can significantly enhance the dough’s properties.
Resting Temperature and Humidity
Maintaining the right temperature during dough rest is crucial for ideal gluten relaxation and hydration. Usually, you should rest your malloreddus dough at room temperature for 30 minutes to an hour. This allows gluten strands to hydrate and relax, improving elasticity without over-toughening. Refrigeration isn’t necessary unless you plan to rest the dough for several hours; cold slows gluten development and can alter texture if not adjusted properly. Humidity also influences dough hydration—drier environments may require slightly more water, while humid conditions can make the dough sticky. To prevent surface drying, cover the dough tightly with plastic wrap or a damp towel during resting. Proper resting conditions are essential for achieving the desired dough texture, which is why controlling temperature and humidity is so important. Additionally, understanding AI safety measures can help prevent unintended consequences during food processing automation.
Effects on Dough Flexibility
Kneading develops a strong gluten network that directly impacts dough flexibility. With about 10-15 minutes of kneading, the dough becomes elastic enough to stretch and bounce back during shaping, essential for forming malloreddus’ ridges and shells. Over-kneading can toughen the dough, so aim for a smooth, elastic consistency without stickiness. The amount of water you add influences gluten development: too much water weakens the network, reducing elasticity, while too little hampers gluten formation. Resting the dough for 30-60 minutes wrapped in plastic relaxes gluten strands, increasing pliability and making it easier to shape. Proper resting prevents shrinking and tearing, while insufficient resting leaves the dough too tight. Resting too long risks drying out the dough, diminishing its elasticity. Incorporating protective styling benefits during resting can help maintain the dough’s integrity and prevent overworking.

Vtopmart Airtight Food Storage Containers with Lids 4PCS Set 3.2L, Plastic Spaghetti Canisters for Pasta organizer, BPA Free Air Tight Kitchen Pantry Organization
[Horizontal Storage] Our pasta storage containers can lay horizontally from front to back of the cabinet instead of…
As an affiliate, we earn on qualifying purchases.
As an affiliate, we earn on qualifying purchases.
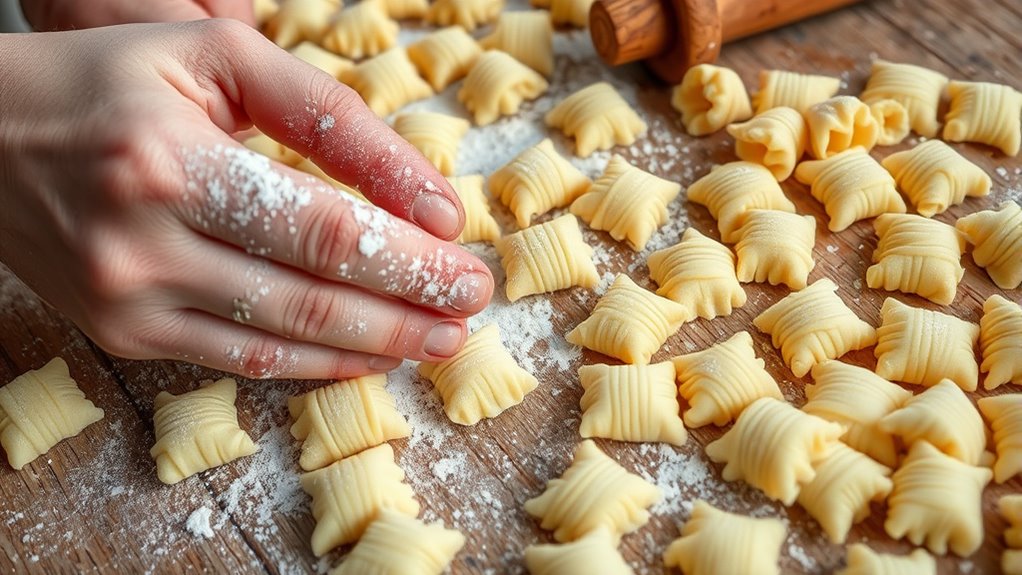
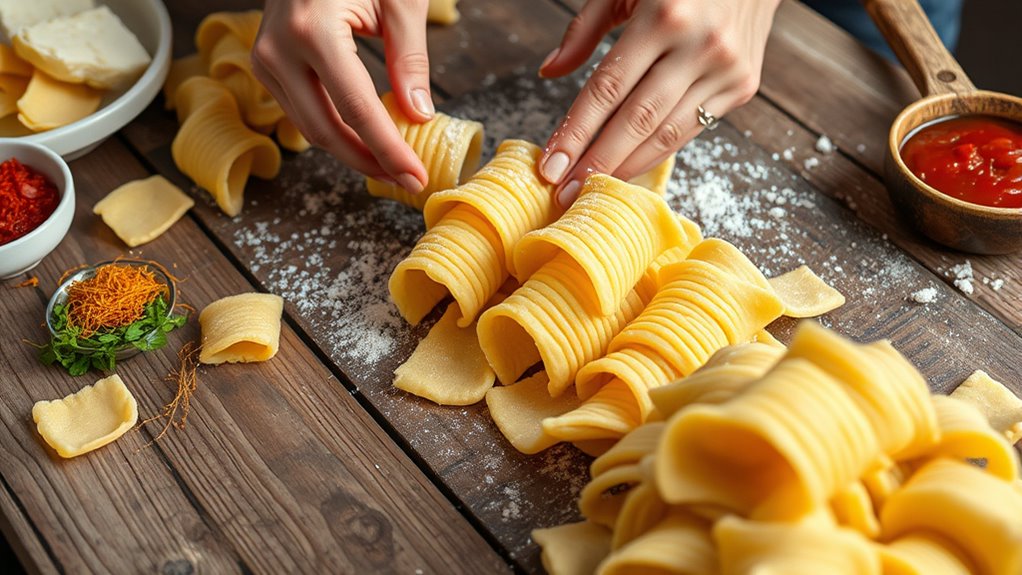
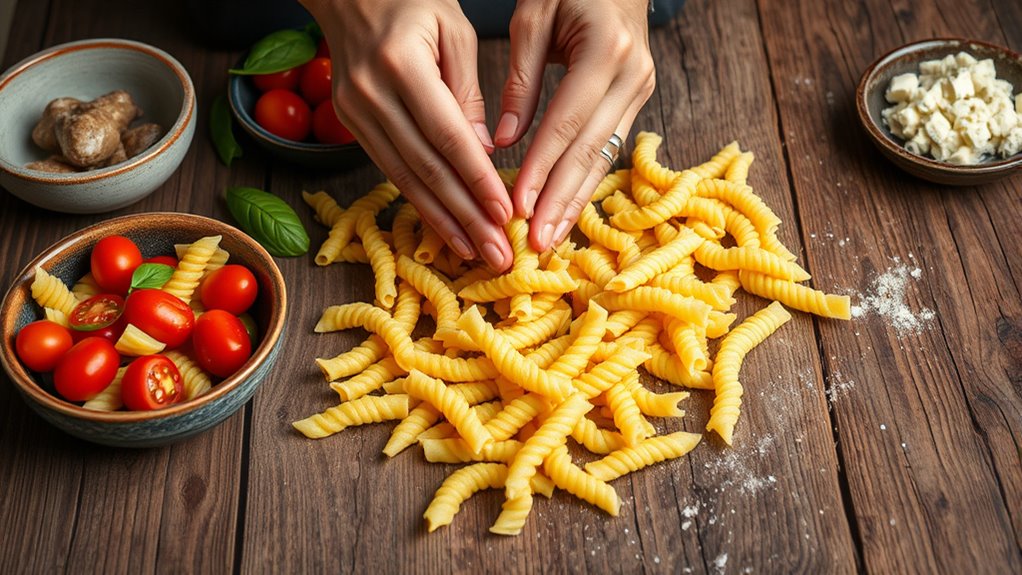
Shaping Malloreddus: Techniques and Tips
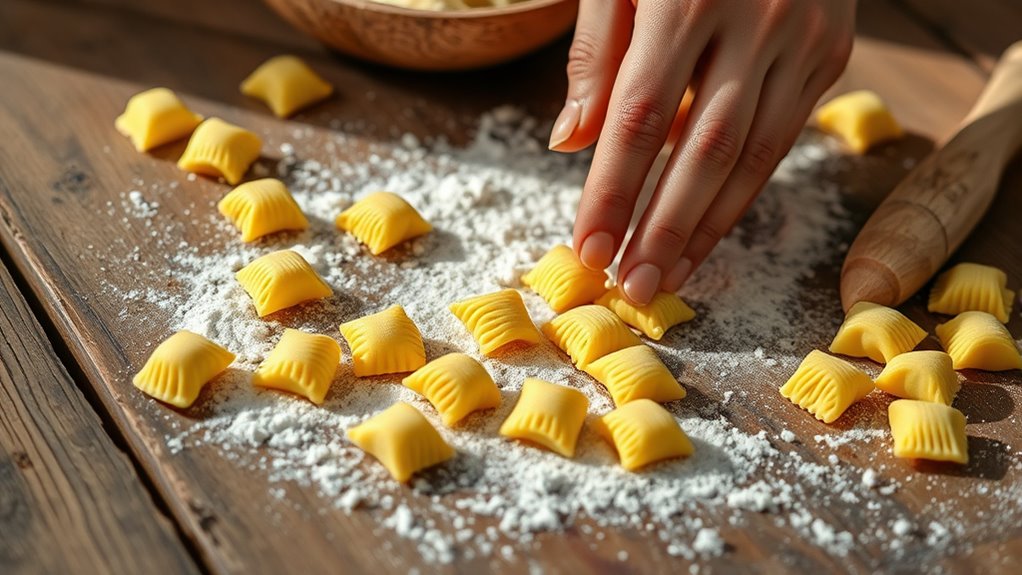
Shaping malloreddus requires a combination of technique and attention to detail to achieve the traditional shell-like form. Begin by dividing your dough into small portions to keep it manageable and prevent drying out. Roll each piece into a thin rope about 1 cm in diameter, then cut into 2 cm long segments. Lightly dust with semolina flour to prevent sticking. To shape, press each piece with your thumb onto a textured surface, creating a curved indentation. Gently roll while applying thumb pressure to elongate and form ridges. You can use common kitchen items like a cheese grater or textured glass to mimic traditional ridges. Consistent size and shape help ensure even cooking and authentic appearance, making your malloreddus both beautiful and delicious. Paying attention to shaping techniques can significantly improve the final presentation and texture of your dish.
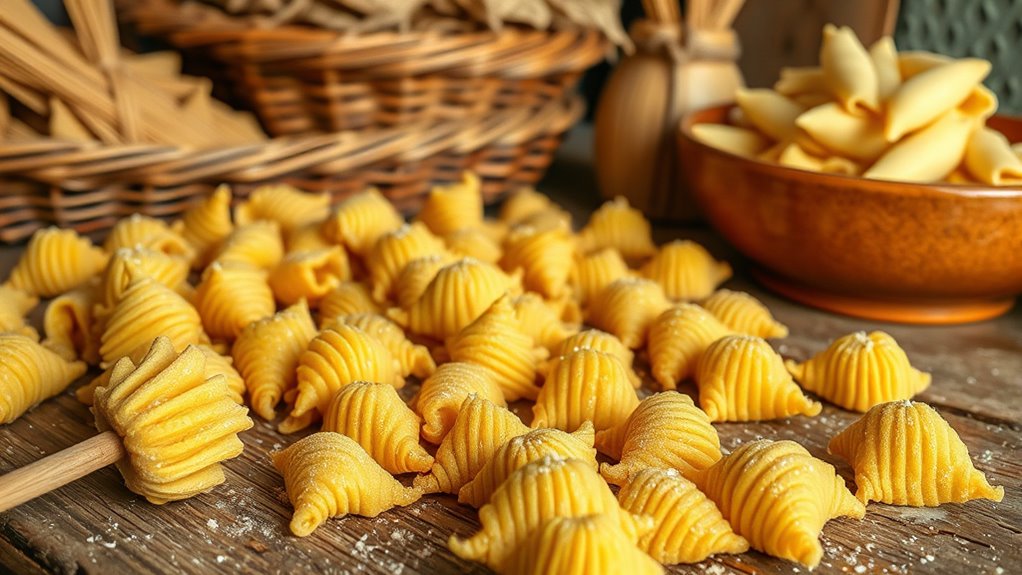
Using a Gnocchi Board or Fork to Create Ridges
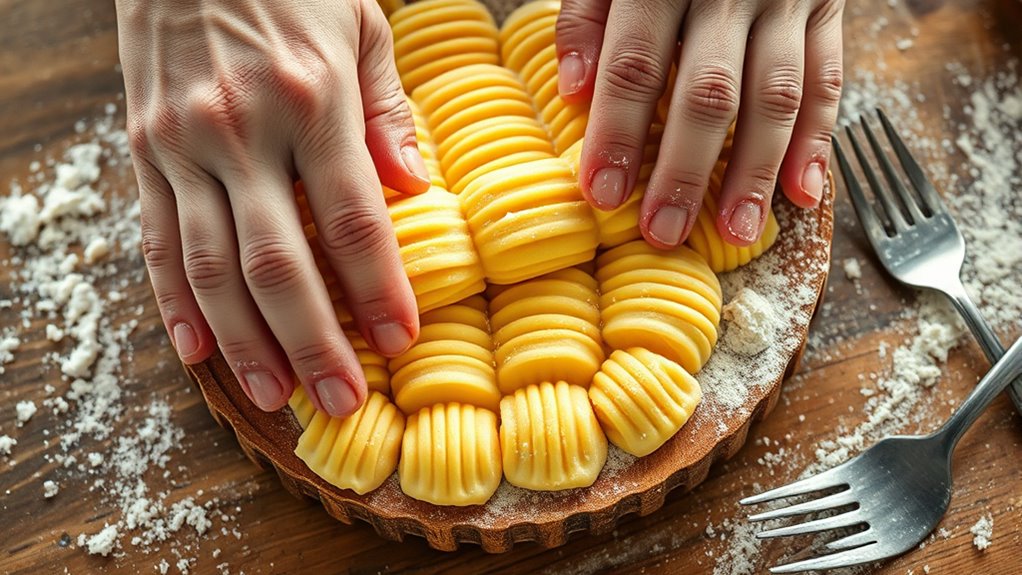
Using a gnocchi board or fork is essential for creating the distinct ridges that help malloreddus hold sauce. With steady pressure and proper technique, you can form straight, parallel ridges that give your pasta its authentic texture. Mastering these tools guarantees your malloreddus look traditional and taste fantastic. Semolina flour’s high protein and gluten content make these ridges especially effective at trapping sauces and adding to the pasta’s firm bite. Proper technique in shaping the pasta also enhances its traditional appearance, making your dish more authentic.
Proper Shaping Technique
To create ridges on malloreddus, you can use a traditional gnocchi board or a fork. Place a small dough piece on a semolina-dusted surface. Press your thumb firmly into the dough, then roll it forward or away from you, applying steady downward pressure to imprint ridges. Keep the movement smooth and controlled to guarantee even ridges. As you roll, guide the dough along the grooves of the board or the tines of the fork, shaping it into an oval or shell form. Reapply semolina flour as needed to prevent sticking. Maintain consistent pressure and size for uniform shapes. Rest the shaped malloreddus on a semolina-dusted tray or cloth, avoiding overlap. Proper shaping ensures they hold sauces well and cook evenly.
Achieving Distinct Ridges
Creating distinct ridges on malloreddus involves pressing and rolling small dough pieces against the ridged surface of your chosen tool, whether it’s a gnocchi board or a fork. To get the best results, follow these steps:
- Place a dough piece on the ridged tool, keeping it about ½ inch thick.
- Use your thumb or finger to apply firm pressure, then roll the dough forward, creating ridges as you go.
- Maintain consistent pressure to ensure even ridges and avoid flattening or tearing the dough.
- Properly shaping ridges with a steady, firm motion helps the pasta hold sauce better and improves texture. Additionally, ridge formation techniques influence the overall appearance and cooking consistency of the pasta.
Using a wooden gnocchi board or a fork gives you different ridge textures, but both require a firm, steady motion. Dust the surface with semolina flour to prevent sticking and keep ridges sharp and defined.
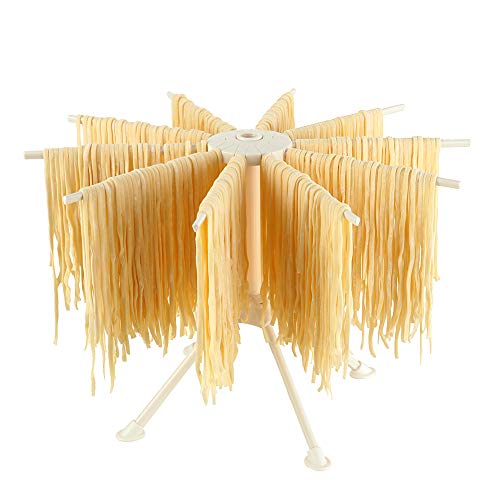
Drying the Shaped Pasta for Optimal Texture

Properly drying malloreddus is essential to achieve the best texture and prevent issues during cooking. When you dry the shaped pasta correctly, it stabilizes the shape, prevents sticking, and ensures a firm, al dente bite. Use a low temperature around 30-35°C and allow about 24 hours for drying. Good air circulation is vital to remove moisture evenly, while spreading the pasta in a single layer with space between pieces helps avoid clumping. Cover the drying tray loosely to protect from dust but still let moisture escape. Avoid high temperatures or rushing the process, as this can cause cracks or brittleness. Proper drying extends shelf life and improves sauce adhesion, resulting in a better overall texture when you cook the malloreddus. Consistent drying practices help ensure the pasta maintains its shape and quality over time.
Boiling and Cooking Malloreddus to Al Dente
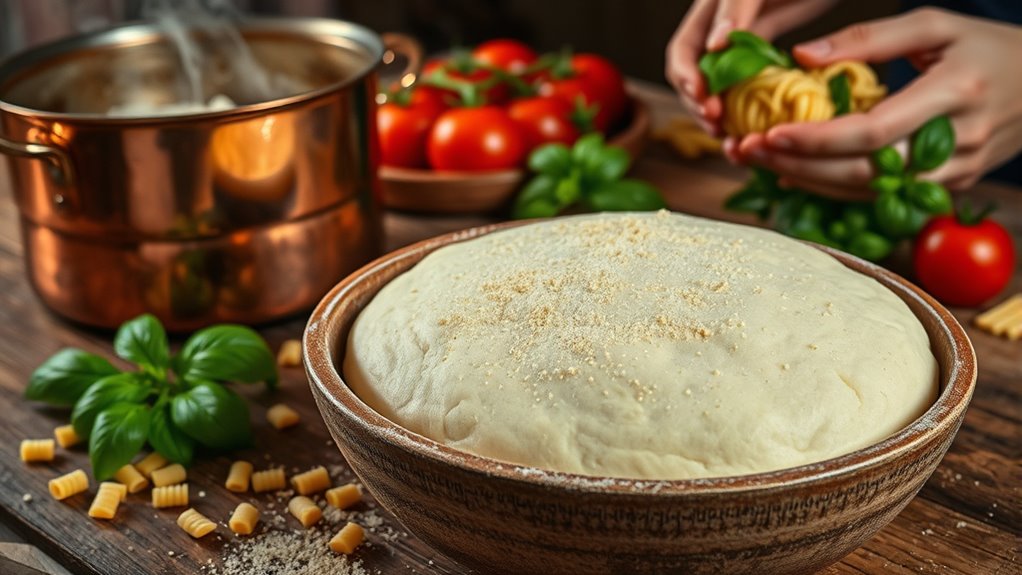
When boiling malloreddus, starting with a large pot filled with plenty of salted water guarantees the pasta cooks evenly and prevents sticking. Bring the water to a vigorous rolling boil before adding the pasta to ensure immediate cooking and avoid clumping. Here are some key tips:
- Cook fresh malloreddus for 5-7 minutes until they reach an al dente texture, tasting for firmness without being raw.
- Stir gently a few times during boiling to prevent sticking, but avoid vigorous agitation.
- Drain immediately once done to prevent over-softening, and toss with your sauce right away to lock in flavor and prevent sticking.
- Using a timer can help you monitor cooking time precisely, ensuring perfect doneness every time.
Avoid rinsing with cold water, as surface starches help sauce adhere better. Perfect timing and gentle handling are essential for ideal doneness.
Crafting Authentic Sardinian Sauces to Pair
Authentic Sardinian sauces elevate malloreddus by combining simple, high-quality ingredients with time-honored techniques. You start with canned whole peeled tomatoes or passata, simmering them gently with sautéed onions or garlic in extra virgin olive oil. Adding fresh herbs like basil or parsley boosts brightness, while seasonings such as saffron and salt deepen flavor. For a rich, comforting option, you can prepare the classic tomato butter sauce by melting butter into the tomato base, finishing with Parmigiano-Reggiano. The Campidanese sauce features a hearty ragù made from coarsely ground Sardinian pork sausage, simmered with tomato, onion, saffron, and olive oil. Stir in Pecorino Romano or Sardo cheese for that signature sharpness. These sauces reflect Sardinia’s regional flavors and culinary heritage. Regional cuisine emphasizes the use of saffron and local cheeses, which are essential ingredients that define Sardinian dishes.
Garnishing and Serving Your Handmade Malloreddus
To showcase your handmade malloreddus at their best, focus on thoughtful presentation techniques that highlight their distinctive ridged shape and vibrant sauce. Arrange the pasta in shallow bowls or wide plates to emphasize their texture and coating. Use a gentle spoon to transfer the malloreddus with sauce, avoiding breakage and preserving their visual appeal. Enhance the dish with a sprinkle of grated pecorino cheese for flavor and contrasting color. Add a touch of freshness by garnishing with parsley or basil leaves, and finish with a drizzle of extra-virgin olive oil for gloss and richness. Serving immediately in shallow bowls helps to display their ridges effectively, making the dish more inviting. Malloreddus are traditionally served hot to enjoy their full flavor and texture. Garnish with cheese and fresh herbs for color and aroma. Finish with a light drizzle of olive oil for shine.
Preserving and Storing Excess Pasta
Proper preservation and storage of excess fresh pasta guarantee it stays flavorful and safe to eat later. Using Modified Atmosphere Packaging (MAP) can extend shelf life by replacing the air with a mix of nitrogen and carbon dioxide, which suppresses bacteria and molds. Ideal gas ratios like 70:30 or 60:40 N₂:CO₂ help control microbial growth while maintaining quality. The effectiveness depends on the gas barrier film’s properties, such as thickness and permeability, and environmental conditions like temperature. Incorporating biodegradable films aligns with sustainability goals. You can also use bioprotective fermentation, like sourdough starters with Lactobacillus, to naturally delay spoilage without preservatives. Finally, mild heat treatments can further reduce microbial load, keeping your pasta fresh longer without compromising texture or flavor.
Frequently Asked Questions
Can I Use Whole Wheat or Gluten-Free Flour for Malloreddus?
You can try using whole wheat or gluten-free flour, but keep in mind they’ll change the dough’s texture and handling. Whole wheat flour makes the pasta denser and nuttier, so you’ll need to adjust water and kneading. Gluten-free flours require binding agents and careful hydration to hold shape. Expect a different bite and firmness—these aren’t traditional, but with some experimentation, you can create a tasty alternative.
How Do I Prevent the Dough From Sticking During Shaping?
To prevent your dough from sticking during shaping, you should keep the dough well-hydrated but not overly wet, adding extra semolina flour gradually if needed. Lightly dust your work surface and tools with semolina flour, avoiding excess that dries out the dough. Rest the dough wrapped for 30-60 minutes, which relaxes gluten and reduces stickiness. Handle the dough gently, and dust as needed to keep everything smooth and manageable.
Is Saffron Essential, or Can I Skip It?
Saffron isn’t strictly essential when making malloreddus, so you can skip it if needed. While it adds a beautiful golden color and subtle floral flavor, many recipes focus on just semolina and water. If you want a more authentic look and taste, use saffron, but if it’s unavailable or too expensive, you can leave it out without affecting the dough’s structure or your ability to shape the pasta successfully.
How Long Can Homemade Malloreddus Be Stored Before Cooking?
Imagine your homemade malloreddus sitting in the fridge, dreaming of becoming a delicious meal. You should cook them within 2 to 3 days for the best flavor and texture. For longer storage, freeze them and cook directly from frozen. If kept airtight, leftovers can stretch to 3-4 days, but beyond that, their quality diminishes rapidly. Enjoy your pasta while it’s fresh and flavorful!
What Are Alternative Tools if I Don’T Have a Gnocchi Board?
If you don’t have a gnocchi board, don’t worry—you can still shape malloreddus easily. Use the back of a fork to roll the dough, creating ridges similar to those on a gnocchi board. You can also try a bench scraper or a small, textured rolling pin. Just dust your tools and dough with semolina flour to prevent sticking, and you’ll get beautifully shaped malloreddus without specialized equipment.
Conclusion
Now that you know how to make malloreddus from scratch, you can master the art of shaping, boiling, and serving these authentic Sardinian gnocchetti. Embrace the process, enjoy the tradition, and experiment with sauces and garnishes. With patience and practice, you’ll create delicious, homemade pasta that celebrates Sardinian heritage. Keep learning, keep perfecting, and keep savoring every bite of your handcrafted malloreddus.